DataLayer User Guide
This document will guide you through the process of setting up Chia's DataLayer and running a few basic functions. For additional technical resources, see the following:
Commands that modify the blockchain include an optional fee. This fee can be specified in two ways:
- The
-m/--feeparameter can be specified explicitly in the command, as several of the examples in this document show - If the fee option is not explicitly specified, then the
data_layer:feesetting in~/.chia/mainnet/config/config.yamlwill be used. By default, this is set to 1 billion mojos (0.001 XCH) - If neither of these options is set, then no fee will be used :::
If you have already installed Chia version 1.6 or greater and started the reference client, you may skip to the next section: Configure Chia to run DataLayer.
:::
Install and Run Chia
Your firewall might give warnings when installing Chia. This is normal. Allow the installation to continue.
Download the latest Chia installer
Install Chia
- Windows
- Linux
- MacOS
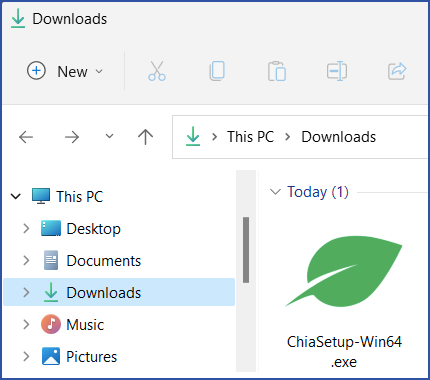
Double click the .exe installer. The installation process will take less than 30 seconds on most computers.
For Debian/Ubuntu Linux distributions, run:
sudo dpkg -i chia-blockchain_<version>_<arch>.deb
For other distributions, see the install Wiki.
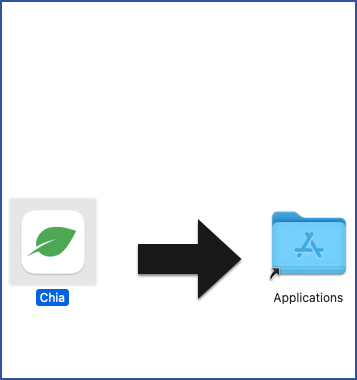
Double click the .dmg installer. After the installation completes, drag the Chia icon to the Applications folder.
- Run the Chia reference wallet GUI:
- Windows
- Linux
- MacOS
The Chia reference wallet GUI will start automatically after the installation completes.
Open a terminal window and run:
chia-blockchain &
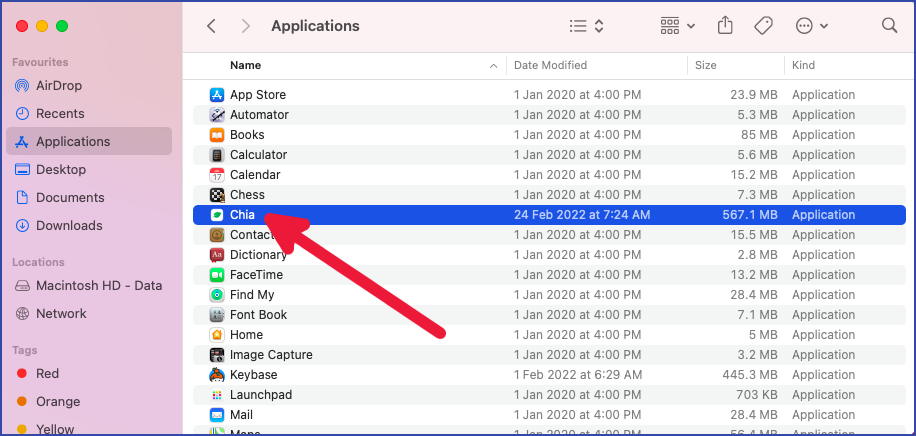
Start Chia from your Applications folder:
- If this is your first time installing Chia on this machine, the
Select Your Client Modedialog will appear:
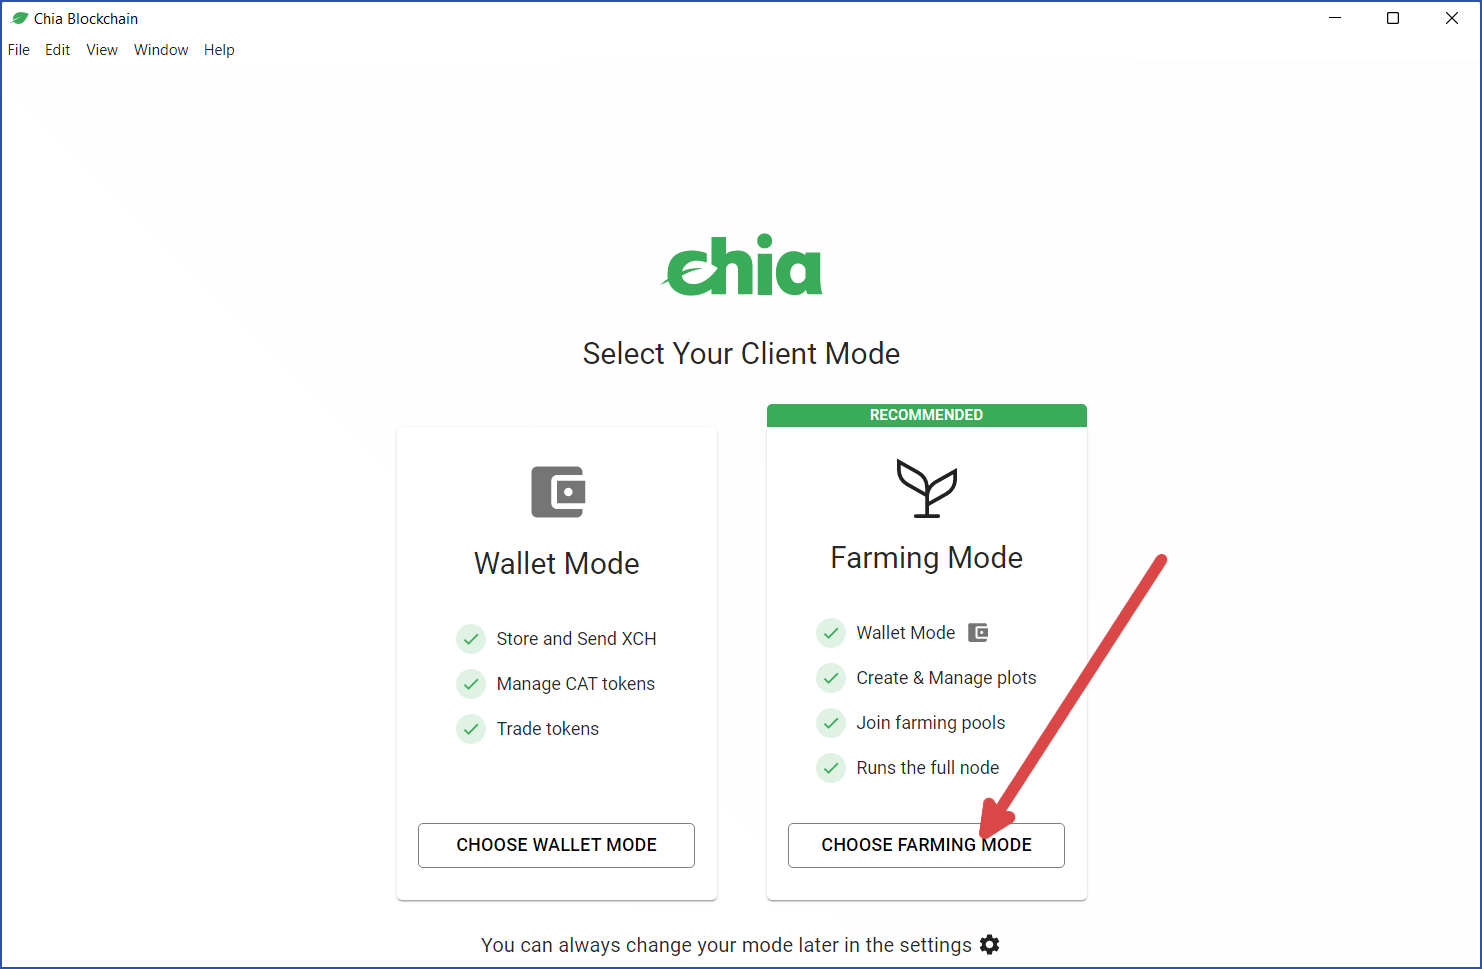
- If you select
Farming Mode, you will run a full node- Advantage: your wallet will respond faster than it would in
Wallet Mode - Disadvantage: you need to sync the blockchain database, which can take several days if you are starting from the genesis block
- Advantage: your wallet will respond faster than it would in
- If you select
Wallet Mode, you will only run a light wallet- Advantage: no need to sync a full node
- Disadvantage: slower wallet performance
- Most users should select
Farming Mode, in order to gain the long-term performance advantage of running a full node
- If you don't already have a Chia private key (wallet), you will need to create one now. If you already have a private key, proceed to step 6.
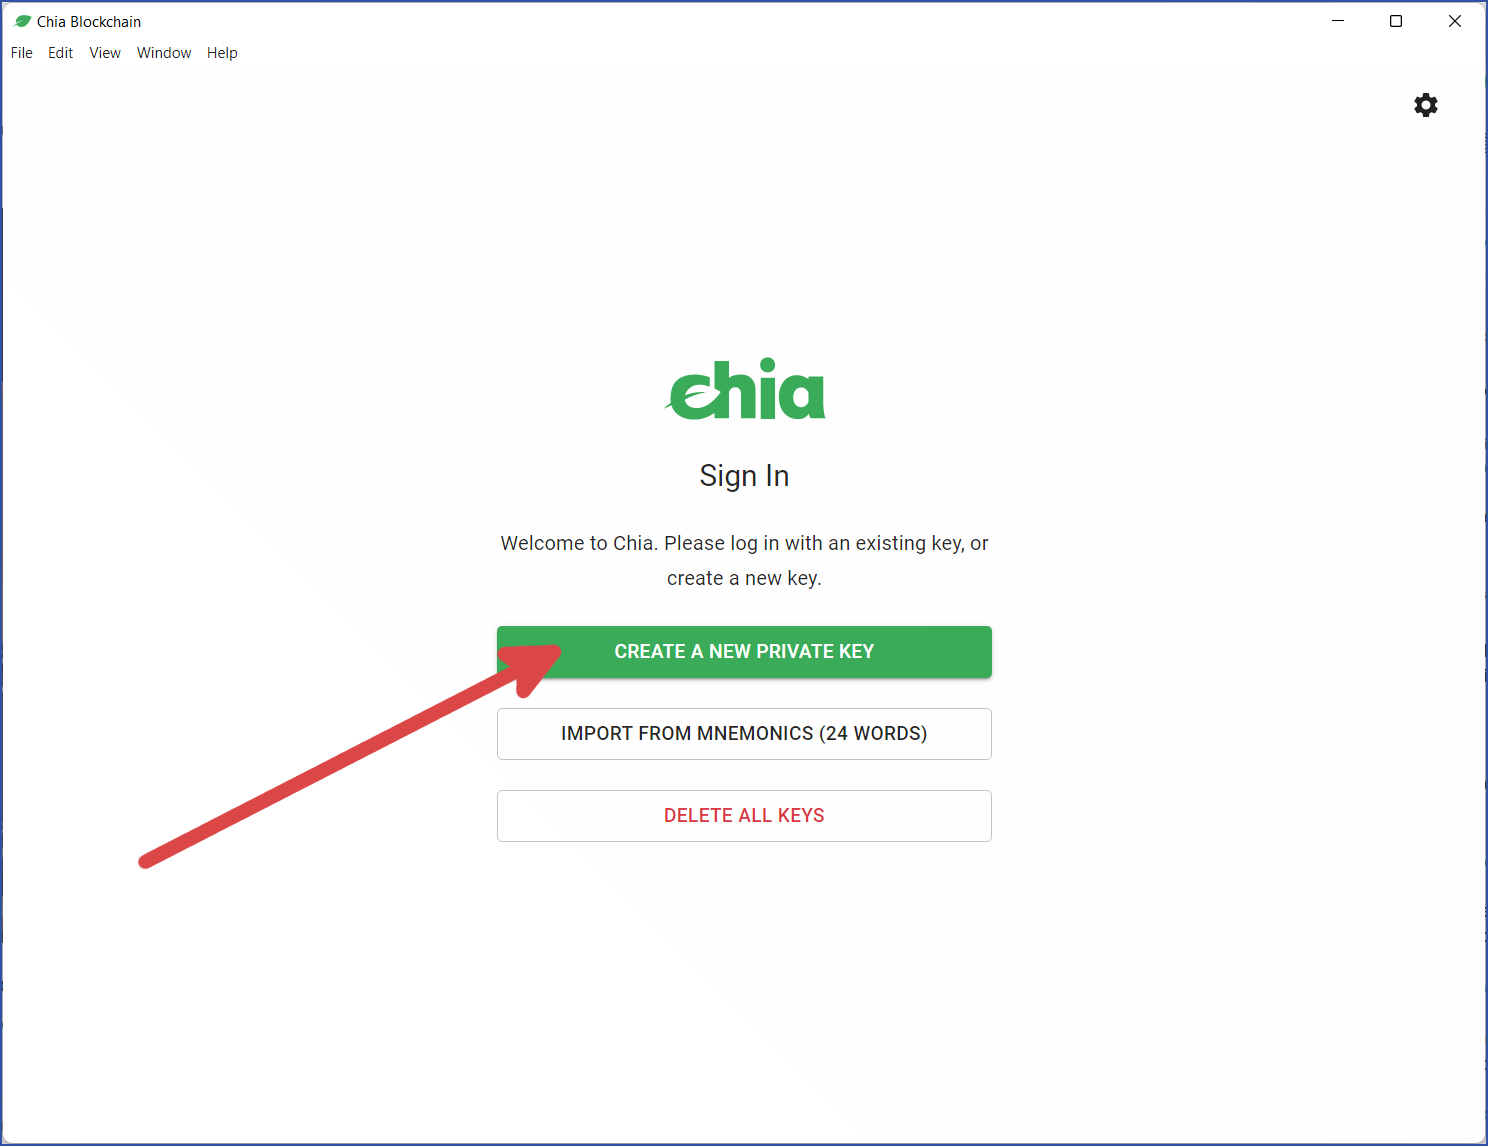
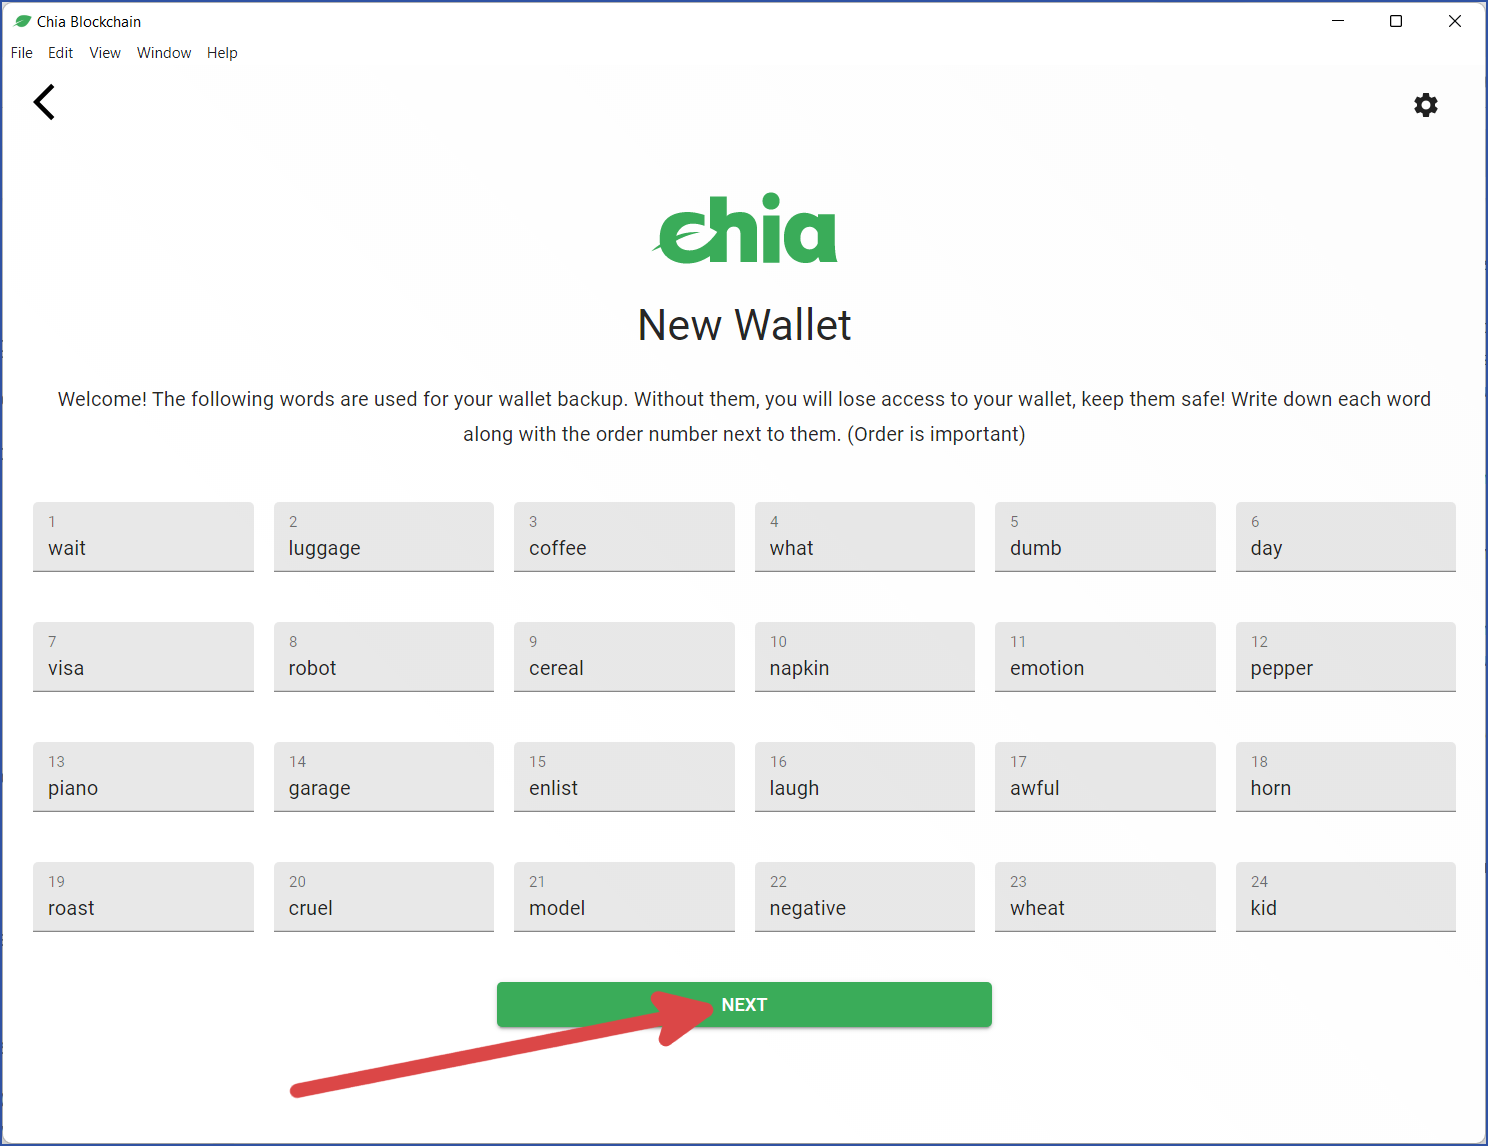
You will be shown a list of 24 words. Copy these words to a private location. Order is important.
Your seed phrase is all that is required to recover your wallet. If you lose your seed phrase, recovery will not be possible. If a bad actor gains access to your seed phrase, they'll be able to steal your Chia. Do not take a picture of your seed phrase or store it on a computer.
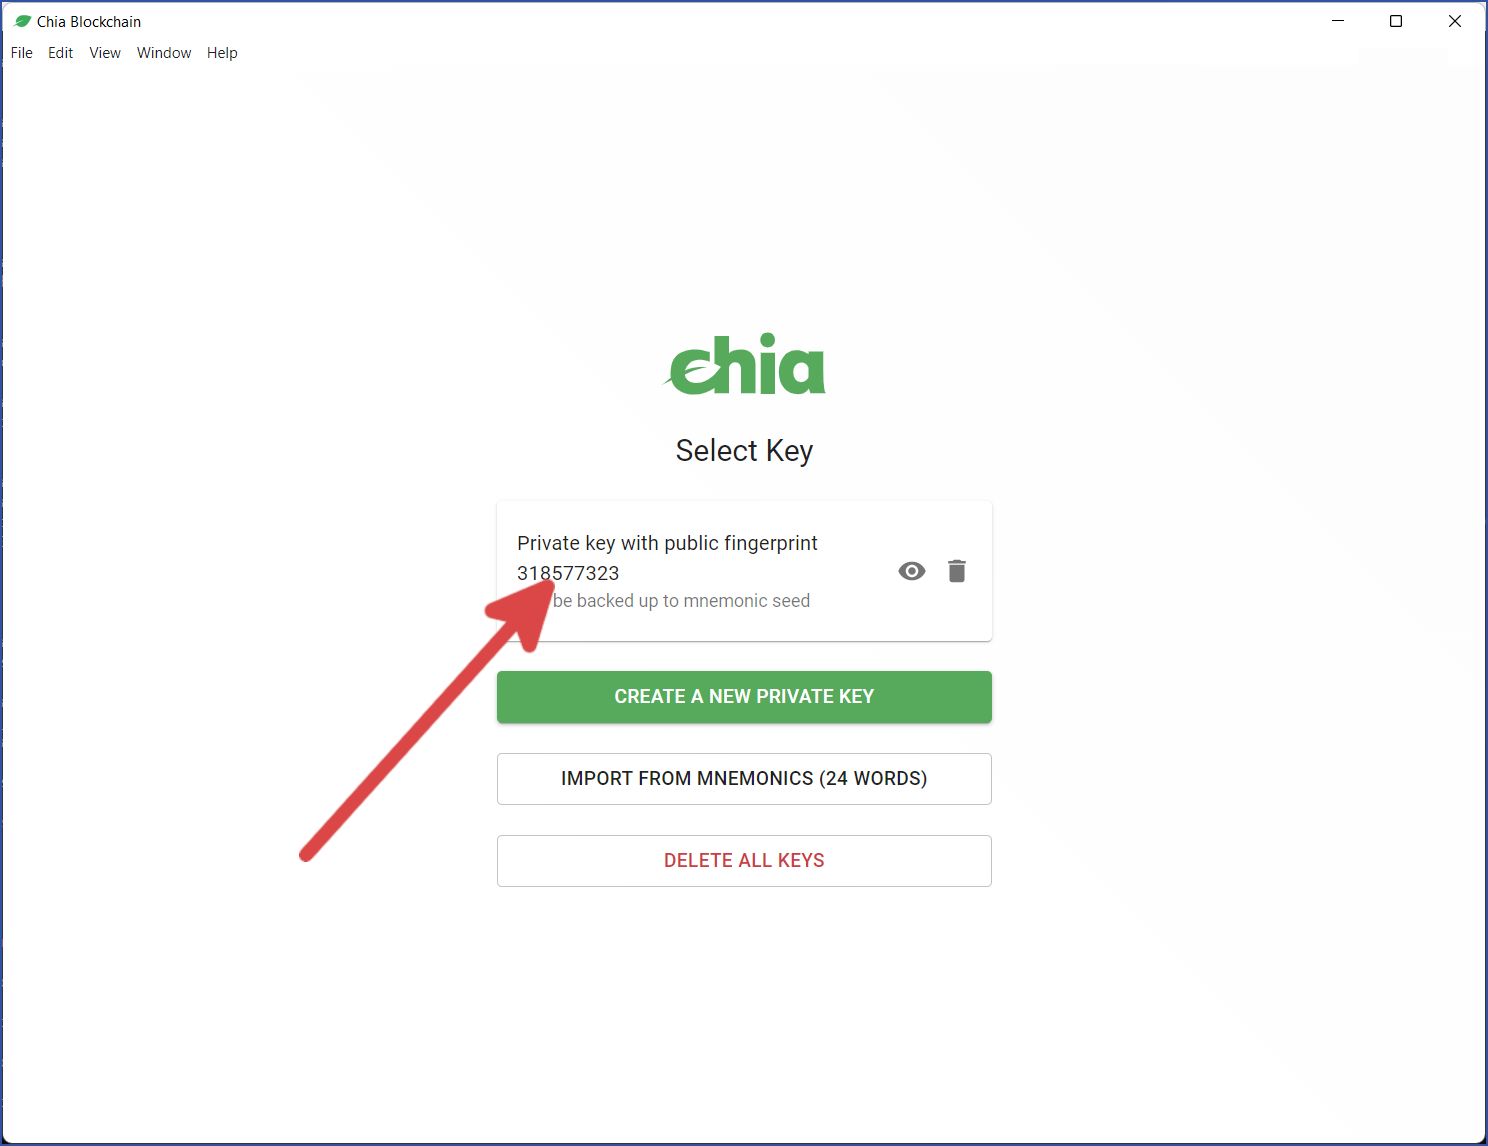
- The
Select Keydialog will appear. If you see multiple keys, select one that has some XCH (if possible).
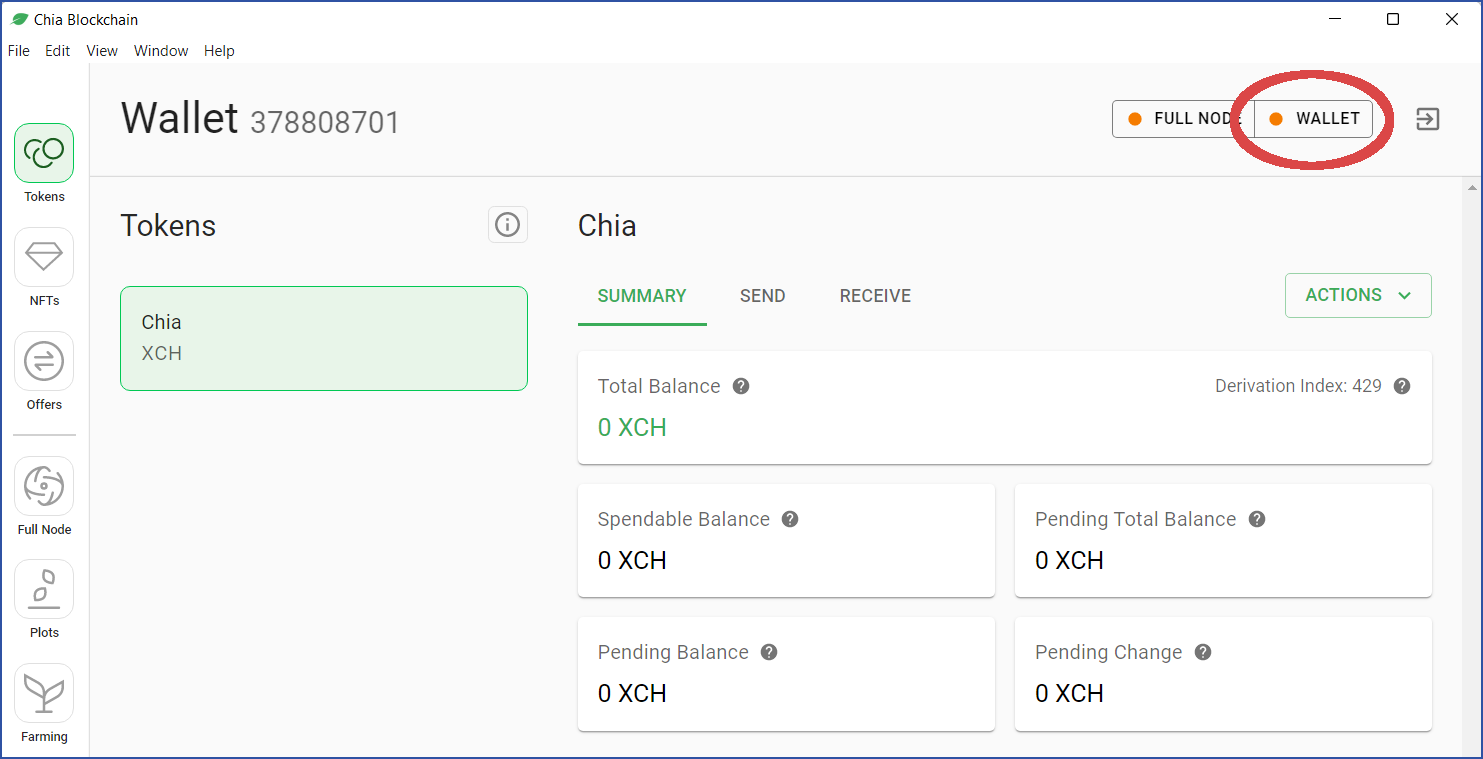
- Your wallet will begin syncing. "WALLET" will appear in the upper right corner. The orange dot indicates that the wallet is syncing. You may proceed to the next step while syncing is in progress.
- Open PowerShell on Windows, or Terminal on Linux and MacOS.
We'll create an alias to run the chia command from any folder. We'll also fix any SSL permissions issues. Run the following command(s):
- Windows
- Linux
- MacOS
(Be sure to update <username> and <version> to match the actual folder structure)
Set-Alias -Name chia C:\Users\<username>\AppData\Local\chia-blockchain\app-<version>\resources\app.asar.unpacked\daemon\chia.exe
Alias command is not needed, but you should still run the following:
chia init --fix-ssl-permissions
alias chia='/Applications/Chia.app/Contents/Resources/app.asar.unpacked/daemon/chia'
chia init --fix-ssl-permissions
- Run
chia version. You should be shown the correct version. For example:
chia version
1.6.0
- (optional) Run
chia configure --set-log-level INFO. This will instruct your Chia installation to log more info than it would have with the default level of WARNING:
chia configure --set-log-level INFO
Result:
Logging level updated. Check ~/.chia/mainnet/log/debug.log
Restart any running chia services for changes to take effect
(You will restart Chia later in this guide.)
- Acquire some XCH. 0.01 XCH is a sufficient amount to get started.
If you ever need to display your address, run chia keys show. This command will only output your public keys and address; your private keys and seed phrase will not be shown.
Configure Chia to run DataLayer
At this point, you should have installed and started Chia. You should also have a synced wallet with some XCH (0.01 XCH is sufficient to get started). You do not need a synced full node.
You are recommended to complete steps 1 and 2 (port forwarding and firewall configuration) in order to run DataLayer. If you skip these steps, DataLayer might not run properly.
Configure your router to forward port 8575 (data propagation server) to your local machine. To configure your router's settings, typically you will need enter
http://192.168.1.1in a web browser, though this address varies for different routers. From your router's settings, locate the Port Forwarding section and add a rule to forward port 8575 to your local IP address.You will also need to configure your computer's firewall to allow connections on port 8575. This process is different for each OS:
- Windows
- Linux
- MacOS
From a PowerShell prompt, run:
start-Process powershell -Verb runAs
This will open a new PowerShell window as an Administrator. From this new window, you will need to run four commands, two for incoming connections and two for outgoing connections.
netsh advfirewall firewall add rule name="allowDataServerIn" dir=in action=allow protocol=TCP localport=8575
netsh advfirewall firewall add rule name="allowDataServerOut" dir=out action=allow protocol=TCP localport=8575
Each of these commands should give a response of Ok. Once you have successfully run the commands, exit the Administrator PowerShell window.
Assuming you use iptables, which is installed on most distributions by default, run:
sudo iptables -I INPUT -p tcp -m tcp --dport 8575 -j ACCEPT
sudo iptables -I OUTPUT -p tcp -m tcp --dport 8575 -j ACCEPT
Next, save the settings. For Ubuntu and Debian, run:
sudo /sbin/iptables-save
For CentOS, Red Hat, and Fedora, run:
/sbin/service iptables save
Open /etc/pf.conf in a text editor. You will need administrative privileges. For example:
sudo vi /etc/pf.conf
Add the following lines to the end of the file:
# Open port 8575 for Chia Data Propagation Server
pass in proto tcp from any to any port 8575
Save and close the file.
To load the changes, run:
sudo pfctl -f /etc/pf.conf
To verify that the changes are active, run:
sudo pfctl -sr | grep 8575
- Start the DataLayer services from the GUI:
(For CLI instructions, skip ahead to step 5.)
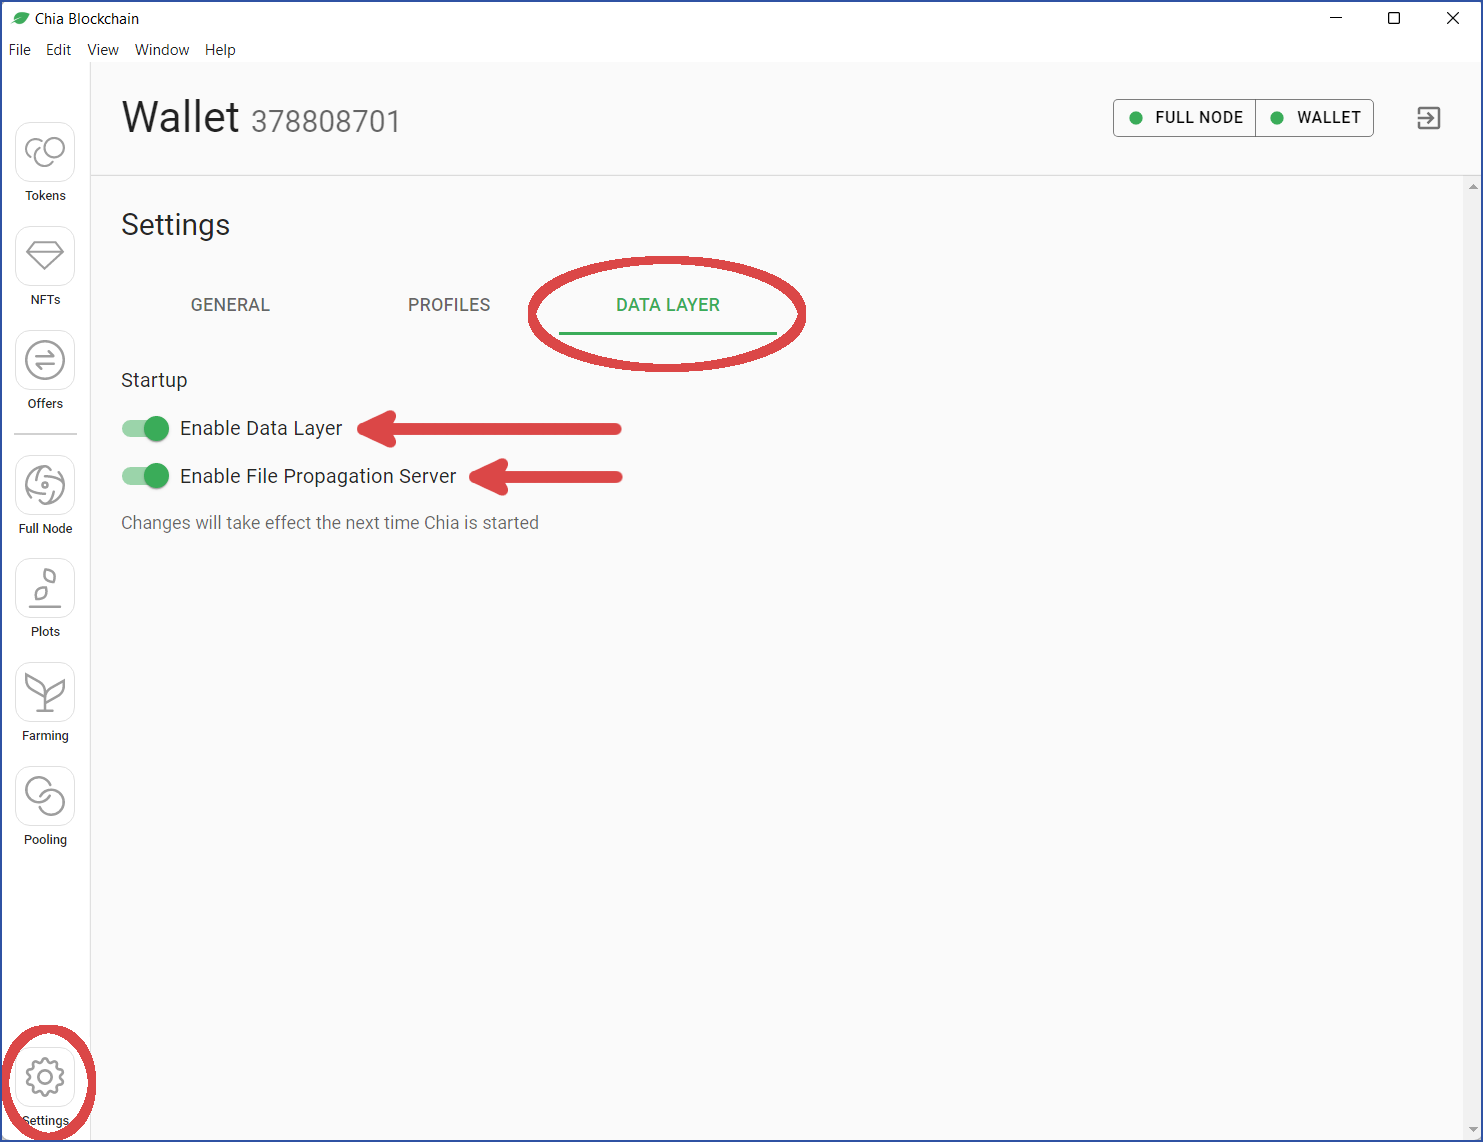
As shown in the above image:
- Click
Settingson the lower left side of your wallet - Click the
DATA LAYERmenu - Click the slider to
Enable Data Layer - A slider titled
Enable File Propagation Serverwill appear. Click this to enable it as well
Finally, you need to restart Chia. Close the GUI and run steps 3 and 6 above. When Chia starts, it will automatically enable both of the DataLayer services.
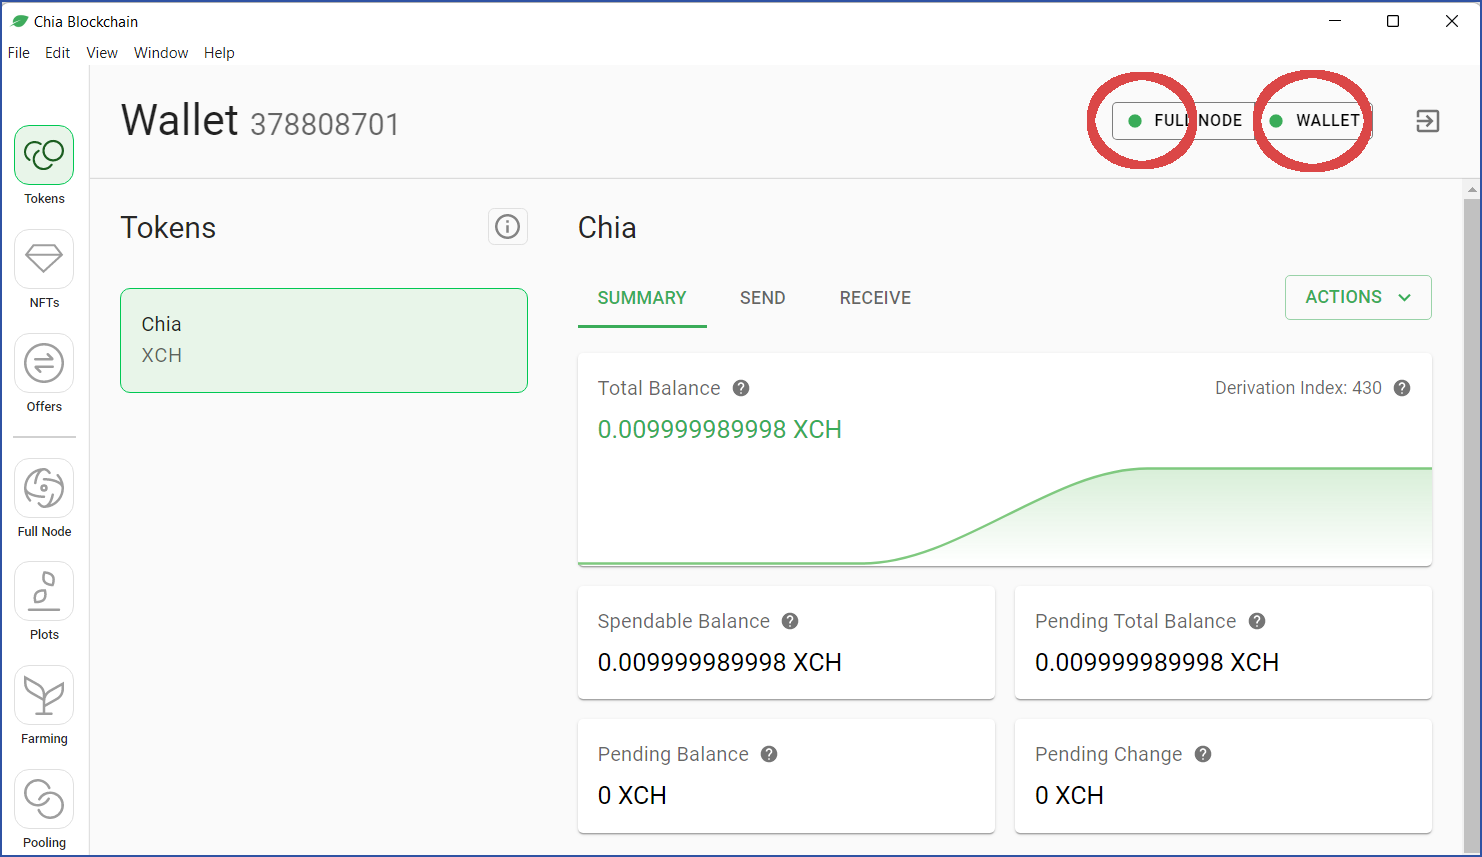
- If the dot to the left of
WALLETis green (indicating that your wallet is synced), then you may proceed. If it is still orange, then you need to wait for it turn green before continuing.
Regardless of the status of FULL NODE, you may safely proceed with this tutorial:
- Orange dot = full node is syncing
- Green dot = full node is synced
FULL NODEis missing = you are running inWallet Mode
- Start the DataLayer services from the CLI
(You can safely skip this step if you already started the DataLayer services from the GUI.)
First, start the DataLayer service:
chia start data
Result:
chia_data_layer: started
Next, start the File Propagation Server:
chia start data_layer_http
chia_data_layer_http: started
Chia and the DataLayer are now installed and configured properly.
Note on Maximum Key and Value Lengths
You may be wondering how much data DataLayer can handle. When testing locally, there are a few important points to consider:
- There is no enforced limit on the length of DataLayer keys or values
- However, your computer must have enough memory (and other resources) to store the keys and values it downloads. A Raspberry Pi with 4 GB of memory will not be able to support the same size data sets as a server with 512 GB of memory
- Additionally, when adding a single key/value pair, the total size of the pair must fit into memory (the individual sizes of the key and value don't matter)
- When running
update_data_storeto add multiple keys, the important metric is the total size of all keys and values in the whole store. Individual keys and values within the same command are unimportant in this context - When discussing the lengths of keys and values, we always refer to the hex values after conversion from their original format
- The amount of data in your request must be smaller than the value of
rpc_server_max_request_body_size, a parameter located in~/.chia/mainnet/config/config.yaml. If you modify this setting, you must restart Chia in order for the change to take effect
Keeping all of this in mind, it is typically safe to insert data sets of up to 50 MiB (no guarantees, though). We expect to support larger sizes in future versions. For now, however, we have only done minimal testing on larger data sets. For example, using curl to add keys and values to an empty tree required the following lengths of time:
- 100 MiB -- 2 to 4 seconds
- 1 GiB -- 45 to 60 seconds
- 2 GiB -- failed to insert
Using DataLayer
Chia DataLayer doesn't have a GUI. The commands in this tutorial will use the command line interface (CLI). As a reminder, here is the complete reference for the CLI, as well as all available Remote Procedure Calls (RPCs):
Create a data store
This requires an on-chain transaction.
The command to create a new store is:
chia data create_data_store -m <fee>
Note that <fee> is a standard transaction fee to use Chia's network. This fee is in XCH.
create_data_store example
chia data create_data_store -m 0.00001
Response:
{
    'id': '1a119374fc7d7055d3419fdcd7f93065f28a1e4acacdf9c73b933b27b685550f',
    'success': True,
    'txs':
    [
        {
            'additions':
            [
                {
                    'amount': 1,
                    'parent_coin_info': '0xb4a1a658aaefd10930ecbccd51ac2c9a4853435b14acdb0de84729bfbefc791c',
                    'puzzle_hash': '0xeff07522495060c066f66f32acc2a77e3a3e737aca8baea4d1a64ea4cdc13da9'
                },
                {
                    'amount': 14999989999999,
                    'parent_coin_info': '0xb4a1a658aaefd10930ecbccd51ac2c9a4853435b14acdb0de84729bfbefc791c',
                    'puzzle_hash': '0x478255c372cec71557c20459f4b690fb1b7c57da3fcfc4b6396d78d9a396e384'
                },
                {
                    'amount': 1,
                    'parent_coin_info': '0x1a119374fc7d7055d3419fdcd7f93065f28a1e4acacdf9c73b933b27b685550f',
                    'puzzle_hash': '0xd650e81d45c7381183c14c3363a81aa78cb3acfe213e46da26df75cd431557f9'
                }
            ],
            'amount': 1,
            'confirmed': False,
            'confirmed_at_height': 0,
            'created_at_time': 1661141324,
            'fee_amount': 10000000,
            'memos': [],
            'name': '0xaee362ae9d0ce3992b3bfb7cc48bde17f3d794cc383ff1d5e49a4d75dbf004d6',
            'removals':
            [
                {
                    'amount': 15000000000000,
                    'parent_coin_info': '0x81fc1729bad3f19699461b1ee455a92493ef4c1d60ba37d22ac187a18367e08e',
                    'puzzle_hash': '0x221c0e9cd9b7f536e9a204ef93519e6c9d4b4c9a049bde8d66fa1816c23120d2'
                },
                {
                    'amount': 1,
                    'parent_coin_info': '0xb4a1a658aaefd10930ecbccd51ac2c9a4853435b14acdb0de84729bfbefc791c',
                    'puzzle_hash': '0xeff07522495060c066f66f32acc2a77e3a3e737aca8baea4d1a64ea4cdc13da9'
                }
            ],
            'sent': 10,
            'sent_to': [],
            'spend_bundle': {
                'aggregated_signature': '0x8c431f07698ad69fd14ab04d77683801e6b908e441074f5ef5268350483d194a09a8b3cde681cb5c5fcf6444e0c9d4bf00999e8e6ad1522891baa590f82d92e2876b08e34b1f3156d0fe88ce206e5ed1567863e10a0397fd0a8a66bcbd5007b0',
                'coin_spends':
                [
                    {
                        'coin':
                        {
                            'amount': 15000000000000,
                            'parent_coin_info': '0x81fc1729bad3f19699461b1ee455a92493ef4c1d60ba37d22ac187a18367e08e',
                            'puzzle_hash': '0x221c0e9cd9b7f536e9a204ef93519e6c9d4b4c9a049bde8d66fa1816c23120d2'
                        },
                        'puzzle_reveal': '0xff02ffff01ff02ffff01ff02ffff03ff0bffff01ff02ffff03ffff09ff05ffff1dff0bffff1effff0bff0bffff02ff06ffff04ff02ffff04ff17ff8080808080808080ffff01ff02ff17ff2f80ffff01ff088080ff0180ffff01ff04ffff04ff04ffff04ff05ffff04ffff02ff06ffff04ff02ffff04ff17ff80808080ff80808080ffff02ff17ff2f808080ff0180ffff04ffff01ff32ff02ffff03ffff07ff0580ffff01ff0bffff0102ffff02ff06ffff04ff02ffff04ff09ff80808080ffff02ff06ffff04ff02ffff04ff0dff8080808080ffff01ff0bffff0101ff058080ff0180ff018080ffff04ffff01b0b3deeeb00319624e26767c5cf777cf9a02d046510181ed29f233e2847fa8ef28ede05d2770bb1b8f101ea8ae20527d61ff018080',
                        'solution': '0xff80ffff01ffff33ffa0eff07522495060c066f66f32acc2a77e3a3e737aca8baea4d1a64ea4cdc13da9ff0180ffff33ffa0478255c372cec71557c20459f4b690fb1b7c57da3fcfc4b6396d78d9a396e384ff860da47513597f80ffff34ff840098968080ffff3cffa084f72a9a3ce5152e1d627a259a0c1c90e6af389cb26af48173d84e374ecc518080ffff3dffa03a0ed375dff192685d1ef9a74424788b04655700bee898f0ea8445f8b55d38338080ff8080'
                    },
                    {
                        'coin':
                        {
                            'amount': 1,
                            'parent_coin_info': '0xb4a1a658aaefd10930ecbccd51ac2c9a4853435b14acdb0de84729bfbefc791c',
                            'puzzle_hash': '0xeff07522495060c066f66f32acc2a77e3a3e737aca8baea4d1a64ea4cdc13da9'
                        },
                        'puzzle_reveal': '0xff02ffff01ff04ffff04ff04ffff04ff05ffff04ff0bff80808080ffff04ffff04ff0affff04ffff02ff0effff04ff02ffff04ffff04ff05ffff04ff0bffff04ff17ff80808080ff80808080ff808080ff808080ffff04ffff01ff33ff3cff02ffff03ffff07ff0580ffff01ff0bffff0102ffff02ff0effff04ff02ffff04ff09ff80808080ffff02ff0effff04ff02ffff04ff0dff8080808080ffff01ff0bffff0101ff058080ff0180ff018080',
                        'solution': '0xffa0d650e81d45c7381183c14c3363a81aa78cb3acfe213e46da26df75cd431557f9ff01ffffa00000000000000000000000000000000000000000000000000000000000000000ffa0adcbcbaf4594e8d3057ea3a64a40560720ede80e720f867d2631069c27459de58080'
                    }
                ]
            },
            'to_puzzle_hash': '0x0202020202020202020202020202020202020202020202020202020202020202',
            'trade_id': None,
            'type': 0,
            'wallet_id': 0
        },
        {
            'additions':
            [
                {
                    'amount': 1,
                    'parent_coin_info': '0xb4a1a658aaefd10930ecbccd51ac2c9a4853435b14acdb0de84729bfbefc791c',
                    'puzzle_hash': '0xeff07522495060c066f66f32acc2a77e3a3e737aca8baea4d1a64ea4cdc13da9'
                },
                {
                    'amount': 14999989999999,
                    'parent_coin_info': '0xb4a1a658aaefd10930ecbccd51ac2c9a4853435b14acdb0de84729bfbefc791c',
                    'puzzle_hash': '0x478255c372cec71557c20459f4b690fb1b7c57da3fcfc4b6396d78d9a396e384'
                }
            ],
            'amount': 1,
            'confirmed': False,
            'confirmed_at_height': 0,
            'created_at_time': 1661141324,
            'fee_amount': 10000000,
            'memos': [],
            'name': '0xbb4cb461126d9ea9492e767462b9a4e408e497231c2093474cba2bcfe4397104',
            'removals':
            [
                {
                    'amount': 15000000000000,
                    'parent_coin_info':
                    '0x81fc1729bad3f19699461b1ee455a92493ef4c1d60ba37d22ac187a18367e08e',
                    'puzzle_hash': '0x221c0e9cd9b7f536e9a204ef93519e6c9d4b4c9a049bde8d66fa1816c23120d2'
                }
            ],
            'sent': 0,
            'sent_to': [],
            'spend_bundle': None,
            'to_puzzle_hash': '0xeff07522495060c066f66f32acc2a77e3a3e737aca8baea4d1a64ea4cdc13da9',
            'trade_id': None,
            'type': 1,
            'wallet_id': 1
        }
    ]
}
The only value you need from the JSON blob is id, the first value in the output. In the above example, this was
'id': '1a119374fc7d7055d3419fdcd7f93065f28a1e4acacdf9c73b933b27b685550f',
You can't do anything with this store until it is confirmed on-chain. To check the status of this confirmation, run the get_root command, passing in the id.
get_root example 1
Your data store will be empty when you first create it. In this case, get_root will return an empty hash:
chia data get_root --id 1a119374fc7d7055d3419fdcd7f93065f28a1e4acacdf9c73b933b27b685550f
Response:
{
    'confirmed': True,
    'hash': '0x0000000000000000000000000000000000000000000000000000000000000000',
    'success': True,
    'timestamp': 1661148563
}
get_root example 2
After you have added at least one key, get_root will return a real hash:
chia data get_root --id 1a119374fc7d7055d3419fdcd7f93065f28a1e4acacdf9c73b933b27b685550f
Response:
{
    'confirmed': True,
    'hash': '0xd6d6b4d6bbd77aaa5927c8a21a1451b35f4860a7f9a58e51dae04037da9c08e8',
    'success': True,
    'timestamp': 1661148611
}
Add and Delete Keys
This requires an on-chain transaction.
Use update_data_store to modify your singleton. Actions include insert and delete. These can also be chained together.
For more example of using this command, see the CLI reference.
update_data_store -- insert example
chia data update_data_store --id=1a119374fc7d7055d3419fdcd7f93065f28a1e4acacdf9c73b933b27b685550f -d '[{"action":"insert", "key":"0003", "value":"abc123"}]'
Response:
{
    'success': True,
    'tx_id': '0xed157b50b94a849d3d19a0ef4e1b0e07bda863e4d65bd1527fa6f59062bb5c78'
}
update_data_store -- delete example
chia data update_data_store --id 1a119374fc7d7055d3419fdcd7f93065f28a1e4acacdf9c73b933b27b685550f --changelist '[{"action":"delete", "key":"0003"}]'
Response:
{
    'success': True,
    'tx_id': '0x2a64ef42baf05c6f4d446ba8638c2f2b2c26e5a91ad62e0c5151df40d0f92ec2'
}
View Keys and Values
You can view the keys and values with get_keys_values. This command will only return data that has been confirmed on-chain -- if you run it immediately after adding data, it may not return the keys you expect.
get_keys_values example
For this example, there are two keys in the store:
chia data get_keys_values --id 1a119374fc7d7055d3419fdcd7f93065f28a1e4acacdf9c73b933b27b685550f
Response:
{
    'keys_values': [
        {
            'atom': None,
            'hash': '0x7e193b814080e50aa7780bcf71fd0422a0397ad3e57dc1eac71d93183efb39ba',
            'key': '0x0004',
            'value': '0x123abc'
        },
        {
            'atom': None,
            'hash': '0xc2dc94c2a85d7db4cfdd1d907bcc441c8fce595db2e2075b973fb8171e2f19a2',
            'key': '0x0005',
            'value': '0xbeadfeed'
        }
    ],
    'success': True
}
View on-chain history
Use get_root_history to view the on-chain history of the root hash.
get_root_history example
chia data get_root_history --id 1a119374fc7d7055d3419fdcd7f93065f28a1e4acacdf9c73b933b27b685550f
Response:
{
    'root_history': [
        {
            'confirmed': True,
            'root_hash': '0x0000000000000000000000000000000000000000000000000000000000000000',
            'timestamp': 1661141342
        },
        {
            'confirmed': True,
            'root_hash': '0xe488fa1bf0f712b224df0daf312b3d479f80e3a330d4bebd8f26a0d52dc0ebbb',
            'timestamp': 1661144917
        },
        {
            'confirmed': True,
            'root_hash': '0x0000000000000000000000000000000000000000000000000000000000000000',
            'timestamp': 1661145223
        },
        {
            'confirmed': True,
            'root_hash': '0xb5420e65846ded936d1e4855c066247fc461a3b281cd9e0e69f3cfa4df529ba2',
            'timestamp': 1661145404
        },
        {
            'confirmed': True,
            'root_hash': '0xd6d6b4d6bbd77aaa5927c8a21a1451b35f4860a7f9a58e51dae04037da9c08e8',
            'timestamp': 1661148611
        }
    ],
    'success': True
}
Create A Mirror to Advertise A Data Store
This requires an on-chain transaction.
We include an HTTP server that can be used out of the box. By default it listens to port 8575.
To "advertise" your mirror on-chain you use the add_mirror command. This command takes three arguments:
i-- Your root's IDu-- The URL of your mirror. You can reuse this argument, as shown in the example belowa-- The amount (in mojos) that will be locked into the mirror while it exists. In theory, a system could prioritize mirrors according to how much was spent to create them. Theamountwill be returned to the creator when the mirror is deleted. Minimumamountis 0
add_mirror example
chia data add_mirror -i 67b5e98abd5fef1a1c44ee63077bc5ef75c6cc4dadc9fd52d63a343922ce496b -u http://www.example2.com:8575 -u http://10.1.1.32:8575/ -a 1000
Response:
None
The HTTP server will serve files that are generated by default in the ~/.chia/mainnet/data_layer/db/server_files_location_mainnet directory.
Note that you can mirror any Data Store, not just your own.
Subscribe to a Data Store
You can subscribe to a data store in order to watch for changes and download the data from published mirrors by using the subscribe command:
subscribe example
chia data subscribe -store 8f6ed792bbbf5216f8e55064793f74ce01286b9c1d542cc4a357cf7f8712df1d
Response:
None
Use the subscriptions RPC to list all current subscriptions:
chia rpc data_layer subscriptions
Response:
{
    "store_ids": [
        "1a119374fc7d7055d3419fdcd7f93065f28a1e4acacdf9c73b933b27b685550f",
        "8f6ed792bbbf5216f8e55064793f74ce01286b9c1d542cc4a357cf7f8712df1d"
    ],
    "success": true
}
Once subscribed, you will automatically try to download updates from any published mirrors for that singleton. You can use the earlier mentioned commands get_root_history and get_keys_values to look at the history and data of any subscribed data stores. The HTTP server will automatically start to publish data for all subscribed data stores. However, it won't be advertised on-chain unless you specifically use add_mirror.